This cute Ice Cream Parlour – easily made from a cardboard box – is a really fun and sustainable kids party idea!

Nothing says birthday party quite like ice cream – for adults and kids alike – so this cute recycled cardboard Ice Cream Parlour is sure to spark joy at your next kids party!
In fact, why not go the extra mile and theme your whole party Ice Cream? So many flavours, toppings and styles.. we had the best time trying out several of them in the making of this fun Diy!
This fun & sustainable kids party idea is really inexpensive – and so simple to make in an afternoon! All you need is a cardboard box, a few essentials and – of course – lots and lots of ice cream!

Give your Ice Cream Parlour a completely different style by leaving it unpainted – and adding beautiful fresh flowers! With this design we also cut two heart shaped windows – and added more cornet holders!
What you need to make a cardboard box ice cream parlour:
- Cardbooard Box (or sheet of corrugated cardboard approx.
- Decorative ribbon, 80cm + more for decoration (optional)
- Two curtain rings
- Sequins, pompoms, stickers etc. (optional)
- Acrylic paint (optional)

How to make a cardboard box ice cream stall:

Select a large piece of your caddboard box / corrugated card (approx. ) It needs to fold in the middle, so you can easily select two sides of a cardboard box which already have a fold in the middle.

Paint your box! I gave mine a coat of white on both sides, and then painted one side my chosen colour. Painting it is optional, you can just leave the box as it is, if you prefer!

Mark a heart shaped window in the cardboard. You can draw this freehand – or download our printable PDF below and use that, like I did.
Download our Heart Shape Printable below, if you would like a template for your heart shaped parlour window!
Download our Heart Ice Cream Parlour Printable Here:

Cut out the heart shaped window – using a stanley knife or scissors.

Decorated your parlour! I attached ribbon to the edges with pva glue, but you can decorate your Ice Cream Parlour any way you want!
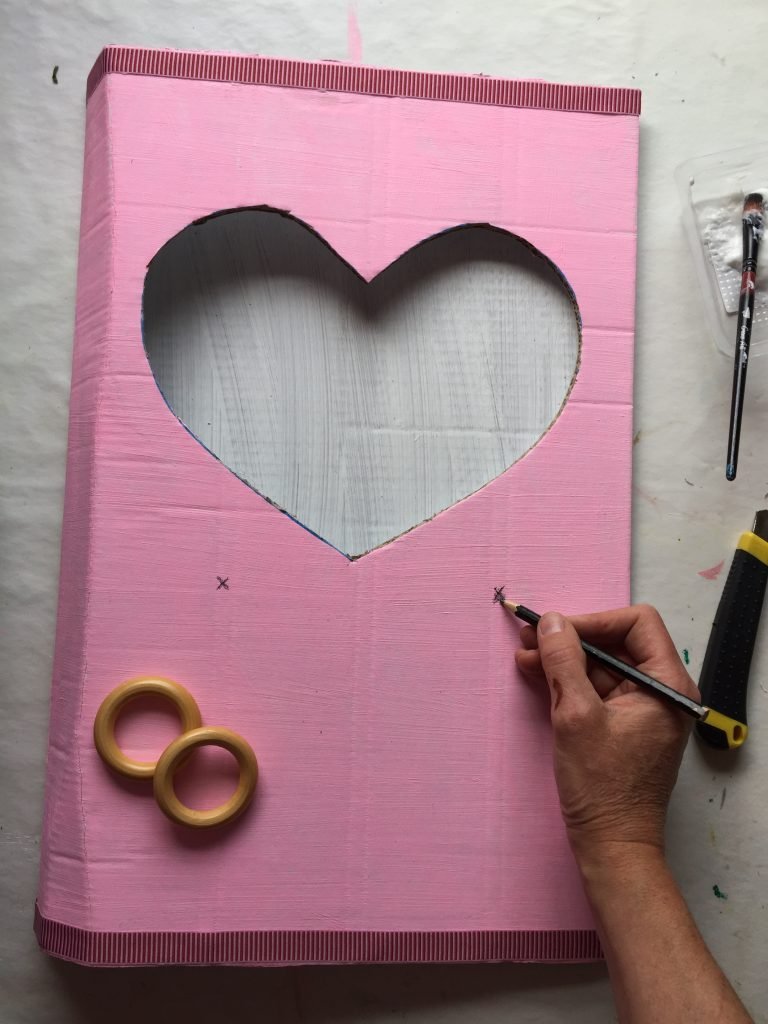
Mark two points under the heart window, and make holes in the card. I pushed a sharp pencil through the card, to create the holes.

Cut two pieces of ribbon, and thread a wooden bead halfway onto both of them (see picture) This will act as a ‘stopper’ when you thread the ribbon through the holes in the cardboard.

Gather both ends of the ribbon together – leaving the wooden bead in the middle – and thread through the holes in your cardboard from the back. Two lengths of ribbon should now appear from each hole, on the front of your parlour. (the picture above shows the back view of the parlour)

Tie one curtain ring to each ribbon – and finish with a nice bow!

Add more decorations to your parlour! (optional… but fun!)

Use the heart shape you cut out for the window, to make a sign for your ice cream stall!

Attach the sign to a stick (optional) you could also hang it on a ribbon!

And Voila! – your Cardboard Box Ice Cream Parlour is finished!
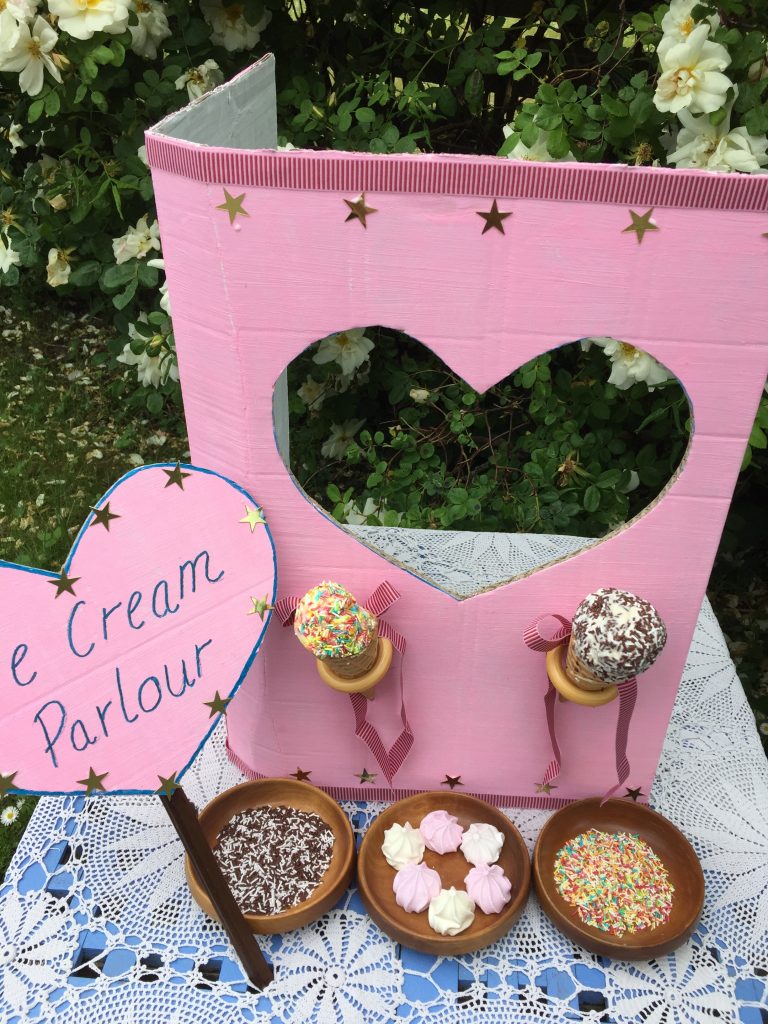
The Cardboard Box Ice Cream Parlour ready for excited customers – just remember to have plenty of ice cream and cornets available!

Place the parlour on any table – or even on the ground!

The view from the back

and from the top..

Ready for business! -unless you eat all the ice creams yourself first!

Who’s for vanilla with chocolate sprinkles?


When the parlour is closed, you can use the sign to close the window!

Thank you for reading – I hope you have fun creating your own Amazing Cardboard Box Ice Cream Parlour! Please contact me with any questions on this project.
Ulla Lake x x


